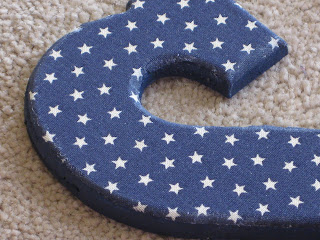
 When I was pregnant, I REALLY wanted to find some cute letters to spell out our daughter's name on her wall. I looked on ebay and found some super cute wooden letters that were much more than I wanted to spend, and then I found some letters that you can stick to the wall that I liked as well. Those were cheaper, but I feared they wouldn't stick very well to her textured wall. So, I decided to take matters into my own hands and make some letters myself! After looking around for ideas online, I found a method where you can use material to cover the letters. Since I had leftover material from her curtains, I decided to try it out. They turned out SUPER cute and I love them. The best part? They were cheap AND easy to do! So, a few weeks ago I decided to make some letters for a special little boy that is coming into the world in a couple of months! (This isn't my child, by the way) ;)
Each letter cost me $1, and I only needed a very small portion of material. So, it was VERY cheap to make! :) Gather your materials... I'll wait.
You will need:
- Wooden letters: These came from Hobby Lobby, but I got the letters for my daughter's room from Walmart
- Enough material the cover each letter: I can't be specific about this because this will obviously vary depending on the size and amount of your letters!
- Paint to match the material: I just used good ol' acrylic paint.
- Sponge brush/paint brush
- Pencil
- Scissors
- Tacky Glue: You may be able to use Modge Podge or some other type of glue, but this is what they had a Walmart for a good price, so this is what I bought! :)
First, take your letters and paint the back and sides. You don't actually have to paint the back if you're hanging them on the wall, but I think it looks nicer. :) I forgot to take a picture before I painted the letters, so just use your imagination. ;)
I'm sure you'll notice that the paint job looks a little messy, but I did that on purpose. No really, I did. ;) The edges of these particular letters are curved, and I wanted to make sure that I covered all of the wood that will be exposed. The material is going to cover those messy edges, so nobody will be able to tell that it looked like this at the beginning.
I realize that you don't necessarily need to see that I painted the back of the letters, but pictures make things more fun, don't they? :) (Note: On my daughter's letters (below), I didn't bother painting the back because the light color of the paint was close to the natural color of the wood. You can't tell at all since her letters are hanging on the wall.) And no, her name is not "Li", I just took two random letters from her name to show you a different sample. ;)
Next, place your letters face down on the back of the material, and carefully trace around each letter. These letters were a little tricky to trace because they were so curvy around the edges, but I just angled the tip of the pencil in towards the letter a little more, and it turned out fine. After you finish tracing, cut the shapes out of the material.
After I cut it out, I like to take the material and place it over the letter to make sure it matches up well.
Now, take your Tacky Glue and put some all over the front of the letter. Do one letter at a time. You only want a THIN layer of glue, so don't overdo it! I just squirted a thin line of glue over the letter and spread it out with the sponge brush. Once your letter is covered with the glue, take the material and gently place it over the letter. Make it match up as closely as possible before pressing it down. Keep in mind that you can get wrinkles easily, so just smooth them out starting front the middle of the letter. The material may get a little damp from the glue, but it will dry. (This is one of the reasons you don't want too much glue!)
(I apologize for the quality of the picture below, but it's the best I have!) Once you get the material stuck down, you may notice your edges sticking out. (If your letters aren't curved on the edges, this won't be as big of a deal) Don't fret--we can fix this. :)
At this point, I recommend getting a paper plate and putting a small amount of glue on it. Now, take your sponge brush and dip the tip of it in the glue. Then gently brush the edges of the material (on top of the material) with the glue as well as the sides of the letters. Sadly, I didn't get a picture of this, so I may have just confused you! Then you want to press the edges of the material down towards the wood. I ran my thumb from the material down towards the wood, across the seam of the edges to get a smooth look. You may have to do that a couple of times. Just do this across all of the edges. (Again, if you have edges that aren't curved, this step may not be necessary at all!) Below you'll notice that the right side of the letter has smooth edges while the left side is still sticking up. Doing this makes a HUGE difference, as you can see. :) Don't worry if you leave behind some dried glue on the paint, we'll take care of that later. ;)
By the way, I had a little bit of trouble pushing down the edges on the curvy parts of the letters. If this happens to you, just take your scissors and make a tiny slit or two on the edges of the material to make it fold down more easily.
Once you finish gluing down all of the edges, you can repaint the sides of the letters. This may not be necessary, but I did this because you could see the glue on the dark blue paint.
Then, well, you're done!
(I am not a photographer, but sometimes I pretend that I am and take pictures like this!)
You don't have to make these for a nursery, you could also spell out your last name for a cute decoration in another part of your house, or spell out whatever you'd like, depending on how much money/work you want to put into it! Just have fun!! :)
Have a happy week!!


Love your idea for your letters! I made some nursery letters recently and you can see them here if you are interested: http://crossmyheartartdesigns.blogspot.com/2011/03/hanging-around-nursery-letters-tutorial.html. Thank you for sharing your idea!
ReplyDeleteLove this, PJ! I may need to do this for Tristan :) You are such the crafty one of the two of us!
ReplyDelete