I just finished! It took a bit of time, but it was actually pretty easy. Wanna make one too? Well, allow me to show you. :) (Disclaimer: This is FAR from perfect, and was my first attempt.)
First, you want to gather your materials. You'll need:
- A onesie (duh): I bought mine from Walmart (Faded Glory brand) for $2!
- At least two different fabrics: I only bought 1/8th of a yard of each (37 cents each!), and I have enough to make several more of these!
- Wonder-Under
- An iron
- Scissors: You want some good scissors that will cut easily through the fabric.
- Pencil
- Cupcake Template (I used the one on THIS page)
- Letter Template: I just used Microsoft Word and typed up 'o n e' (you want a space between each letter to make it easier to cut out). I used the 'Arial Black' font, and made it bold. I made one set size 130, and another set size 150. (This will make more sense later!)
- Ric-Rac (optional)
- Puffy Paint (optional, though I don't recommend... you'll see why) ;)
Next, take a small quarter of each piece of material. I would recommend cutting out a section around 4x5 in. You just want to make sure you have enough material to cut out the letters and the cupcake. Once you cut out the material, place it on the wonder under. The wonder under has instructions that will help you with this part.
After you iron the material onto the wonder under, turn it over and trace your templates onto the back. You need to make sure that you trace your letters backwards so they will come out correctly when you cut them out! :) (Note: When I cut out the 'one' template, I didn't bother cutting out the center of the 'o' and 'e'. I just drew it on after I traced it. It saved a little bit of time and made things easier for me!)
Next, cut out the cupcakes and letters. If you want, you can also make a little candle to top the cupcake. It was easy for me to do with this striped material! I just cut out one pink stripe, then cut a little diamond shape out of the yellow stripe for the flame. I made a 'u' shape at the bottom of the candle just to give it more of a 3D look once it's on top of the cupcake...you'll understand what I mean later...I hope) ;)
When cutting out your shapes and letters, you can just fold the 'o' and 'e' in half to CAREFULLY cut out the centers of the letters.
Now, take the bottom section of the cupcake and iron it on to the onesie.
Then add the top of the cupcake. The bottom layer may show through a little bit if your top color is lighter, but it isn't a big deal.
Next, add the candle, then the flame. Make sure you don't try to save time by adding too many things at one time. You want to make sure that the items are EXACTLY where you want them to be before you iron them on, and it's easier if you're just working with one part at a time.
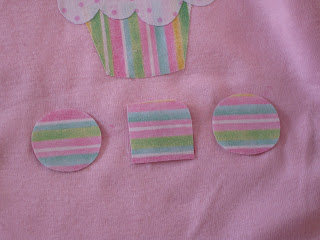
Now add your letters, one at a time.
If you want to add Ric-Rac, arrange how you want it and pin it on before you stitch it. You can also put some at the neck or on the back, wherever you want! I'm assuming you could use a sewing machine, but I just hand-stitched mine. I didn't take a picture of this, but it looks nicer if you fold the end of the Ric-Rac underneath when you're sewing to make a cleaner edge.
In the next picture, you can see that I stitched on the Ric-Rac, and then painted around each letter. This is why I don't recommend the paint, unless you're just awesome at this kind of thing, which I wasn't. ;)
It looks alright, but I liked it much better before. Plus, it's difficult to do this! So, I ended up pulling off the letters after the paint dried, but there was still paint on the onesie. To cover it up, I decided to make a set of letters in a bigger font, and then use the smaller font to layer on top. I know that's confusing. That's why I have pictures!
Notice that on the larger font, I didn't cut out the 'n' or 'e' completely. You'll see why below. I cut out the smaller font on one print of material, and the larger font on the other print.
After I cut the letters out AGAIN, I placed the larger font on the onesie to cover up the paint that was leftover from my mistake. Again, make sure you iron them on ONE AT A TIME! :)
Next, iron on the smaller font letters on top, and then.... *drumroll*
Hooray! :) You can see my imperfections when it's up close like this, but you can't tell on the actual onesie unless you're really looking for them! :)
See?? I told you it wasn't that hard, plus, it's a lot easier if you don't mess up like I did! :) Feel free to leave a comment if you have any questions. I'm sure some of the things I said are as clear as mud! Have fun!!
This blog below has a lot of links to cool projects if you're wanting some inspiration! :)

Lil Blue Boo / Dharma Trading Design Challenge
Nap time Crafters Link Party! :)


No comments:
Post a Comment
We love comments, even if you're just a 'blog stalker'. It's cool, we are too. :)