
Last Saturday, I guest posted on Not JUST a Housewife, and so here is the posting from there. :)
Before M was born, I decided to make some girly curtains for the nursery to add some pink to the neutral Winnie-the-Pooh theme we have going on. I started on them a year and a half ago, finally finished them about month before she was born, got to see them hang in her nursery in their beautiful glory for two months, then we moved to a new house.... where she now has two small windows instead of one big one, so they didn't fit. This equals a sad Jennifer. I was determined to fix them though. Allow me to show you the progression..
We went from this (at the old house)...

To this (at the new house)...

I had to do some brainstorming, and with the help from a sweet lady at our church, we came up with a plan. I ended up splitting each curtain into two pieces, and then making a valence because the curtains weren't tall enough to cover the window on their own. I also had to purchase some more coordinating fabric to add a couple of more panels (two for each window), to go in between the pink curtains. It made the curtains fuller, and made them look better than I ever even imagined! I love them!
Want to make some cute curtains for your little one (or yourself)?? Let's get started!
I'm working with a window that is 52 x 35, so that is what I'm basing all of my measurements on. Make sure you adjust according to your window size! :)
You will need:
- Four 55x22 inch pieces of fabric (Two in one color, and two in a coordinating fabric)
- Two 20x5 inch pieces of fabric (for tie-backs)
- Two 36x5 inch pieces of coordinating fabric (for tie-back ruffles)
- Two 5x2 inch pieces of fabric (for tie-back ends)
- Coordinating Thread
- Sewing Machine
- Scissors
- Pins
- Pencil
- Measuring Tape
- Lace to accent ruffles (optional)
- Keep in mind that if you want ruffles on your curtain panels, you will need extra material. You will also need extra material for the valence, which I'm not including in this tutorial.
 |
 If you aren't adding a ruffle, then go ahead and hem the bottom. If you're wanting to add a ruffle, then you can get an idea of how to do that when I show you how to make the tie-backs. |
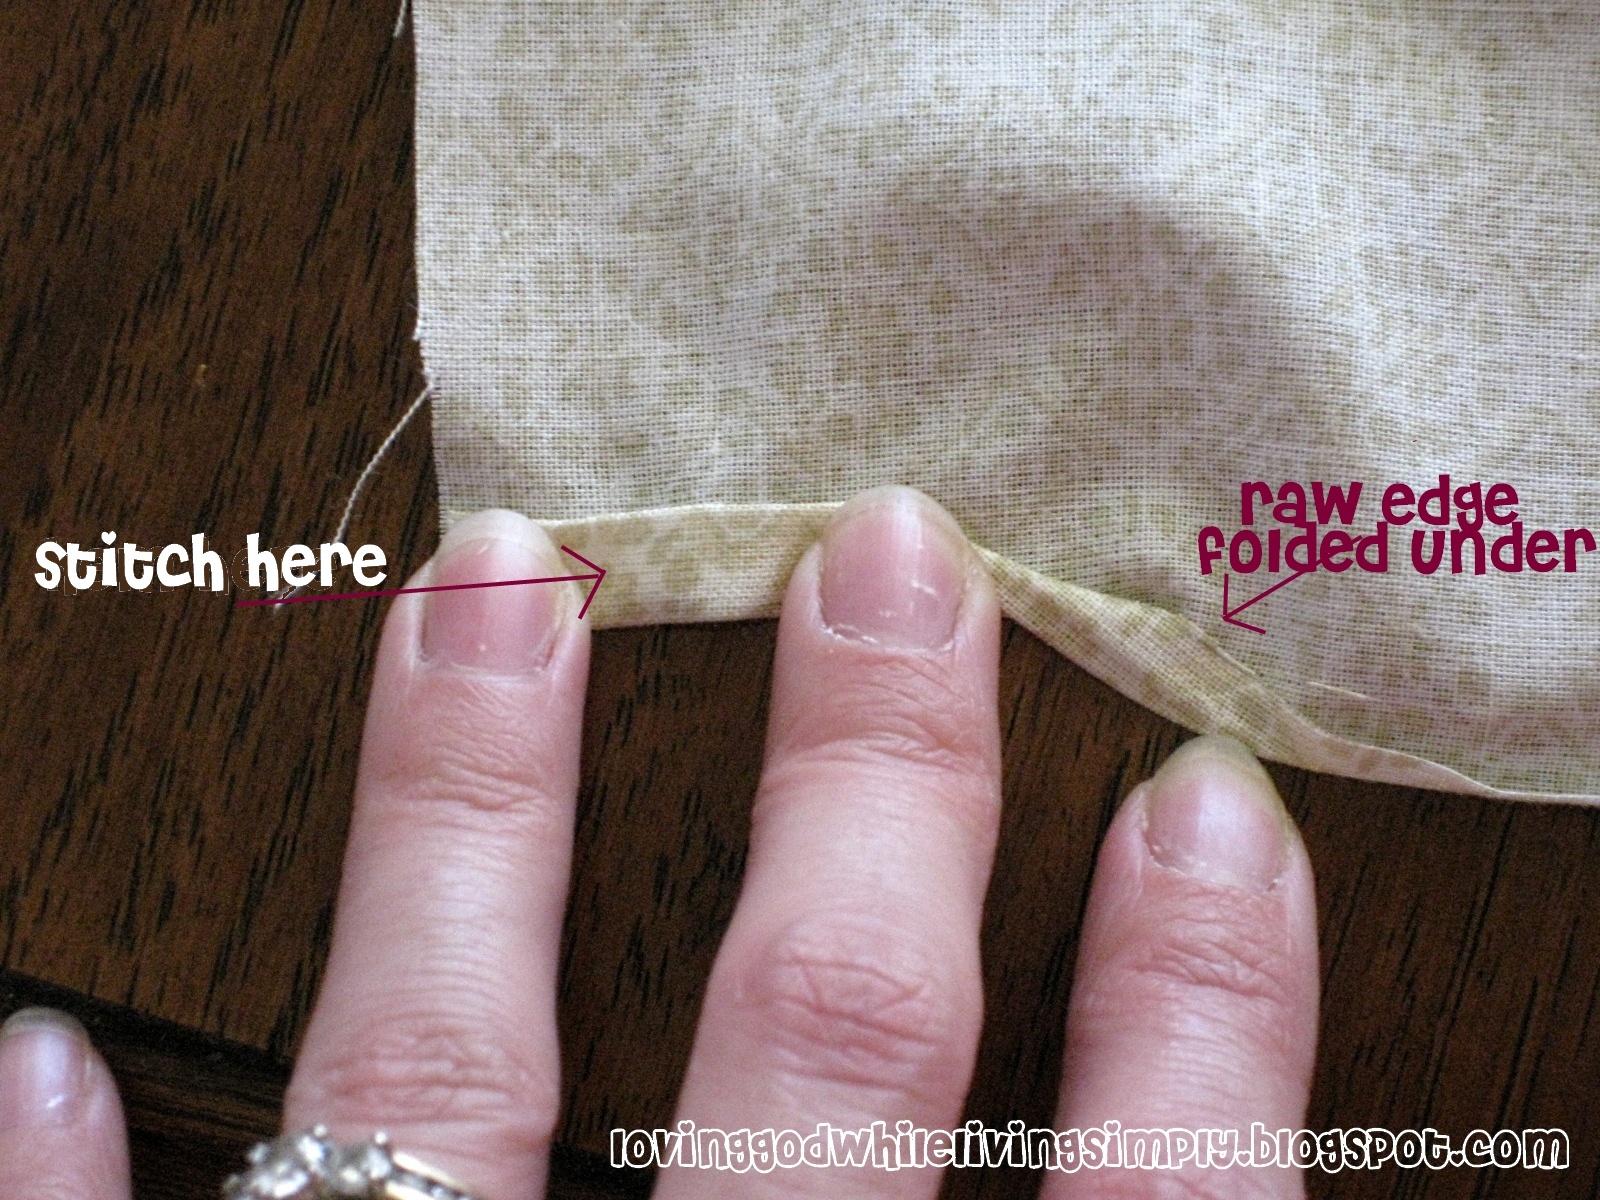
2) Once all of the sides are hemmed, go to the top and just do a raw edge hem, because it will be hidden later.
 |
| Far from perfect, but you can't tell when they're hanging! :) |

4) Now, you need to stitch another line for the rod to go through. You don't have to do this step, but it makes it look nicer. I allowed about an inch and half for the rod, which works, but it's a very tight fit. So, I would suggest going two inches or so from the original stitching line, depending on the size of the curtain rod you'll be using.

Then you're done with the simple panel! :)

Now for the tie-backs...(I'm going to refer to each piece that I'm using by color, to avoid confusion)
5) Take a 20x5 inch piece of pink material, and hem the short sides and the top (raw edge hem).

6) Take a 36x5 inch piece of beige fabric for the ruffle section, and do a double folded hem on the short sides and bottom of the fabric.

7) Next, do a long stitch across the top of the beige ruffle fabric, and then gather it to make it a ruffle. You want to make sure it is gathered to match the length of your pink fabric, above.

8) Now, lay the two pieces of fabric together, right sides facing each other, and pin the fabric together.

9) Stitch across the top. (Note: If you want to place a ruffle on the actual curtain panel, just leave the bottom un-hemmed, and follow steps 6-9 with the appropriate amount of fabric needed.)

10) Fold the top of the pink material over the raw edge of the ruffle, and stitch.


You're almost done! Now you just need to make the end of the tie-backs!
11) Take a 5x2 inch piece of pink fabric, and fold the edges over, so they meet in the middle. Then, fold the material in half, and pin. Stitch.

12) Take your ends, and fold them in half so they form a hoop. Place the ends into the opening of the tie-backs, and then stitch.

All done!! :)


If y'all have any questions, I'll do my best to answer them! Have a fabulous weekend!! :)

No comments:
Post a Comment
We love comments, even if you're just a 'blog stalker'. It's cool, we are too. :)