Showing posts with label Recipes. Show all posts

Sunday, November 27, 2011

Oreo Ice Cream Cake :)

Do yourself a favor, and make this cake.  Whoever came up with this recipe is a genius.


J's birthday was last week and he requested an ice cream cake.  This one was SUPER easy, and SO yummy.  In the words of my beloved mom, "I think I gained five pounds just listening to you describe it."

I made a couple of changes that I think made this even more awesome.  I only made two layers of ice cream sandwiches, instead of three.  I wanted the cake to be longer and not as tall.  I just added all of the fudge/cool whip mixture between the two layers.  Also, I added some more crushed Oreos to the top of the cake, as well as some Chocolate syrup, as if we didn't have enough calories already.  ;)


  • 1/2 cup hot fudge ice cream topping, warmed
  • 1 (8 ounce) tub COOL WHIP Whipped Topping, thawed, divided
  • 1 pkg. (4 serving size) JELL-O Chocolate Flavor Instant Pudding & Pie Filling
  • 8 OREO Chocolate Sandwich Cookies, chopped
  • 12 vanilla ice cream sandwiches, unwrapped

Directions

  1. Pour fudge topping into medium bowl. Add 1 cup of the whipped topping; stir with wire whisk until well blended. Add dry pudding mix; stir 2 min. or until well blended. Gently stir in chopped cookies; set aside.
  2. Arrange 4 of the ice cream sandwiches, side-by-side, on 24-inch-long piece of foil; top with half of the whipped topping mixture. Repeat layers. Top with remaining 4 ice cream sandwiches. Frost top and sides of dessert with remaining whipped topping. Bring up foil sides. Double fold top and ends to loosely seal packet.
  3. Freeze at least 4 hours before serving. Store leftover dessert in freezer.

Seriously, go make this.  Just make sure you walk up a few flights of stairs for the next month or two instead of taking the elevator.  ;)


Have a wonderful Sunday!!


Linking up to Not Just a Housewife, Something Swanky


Tuesday, August 30, 2011

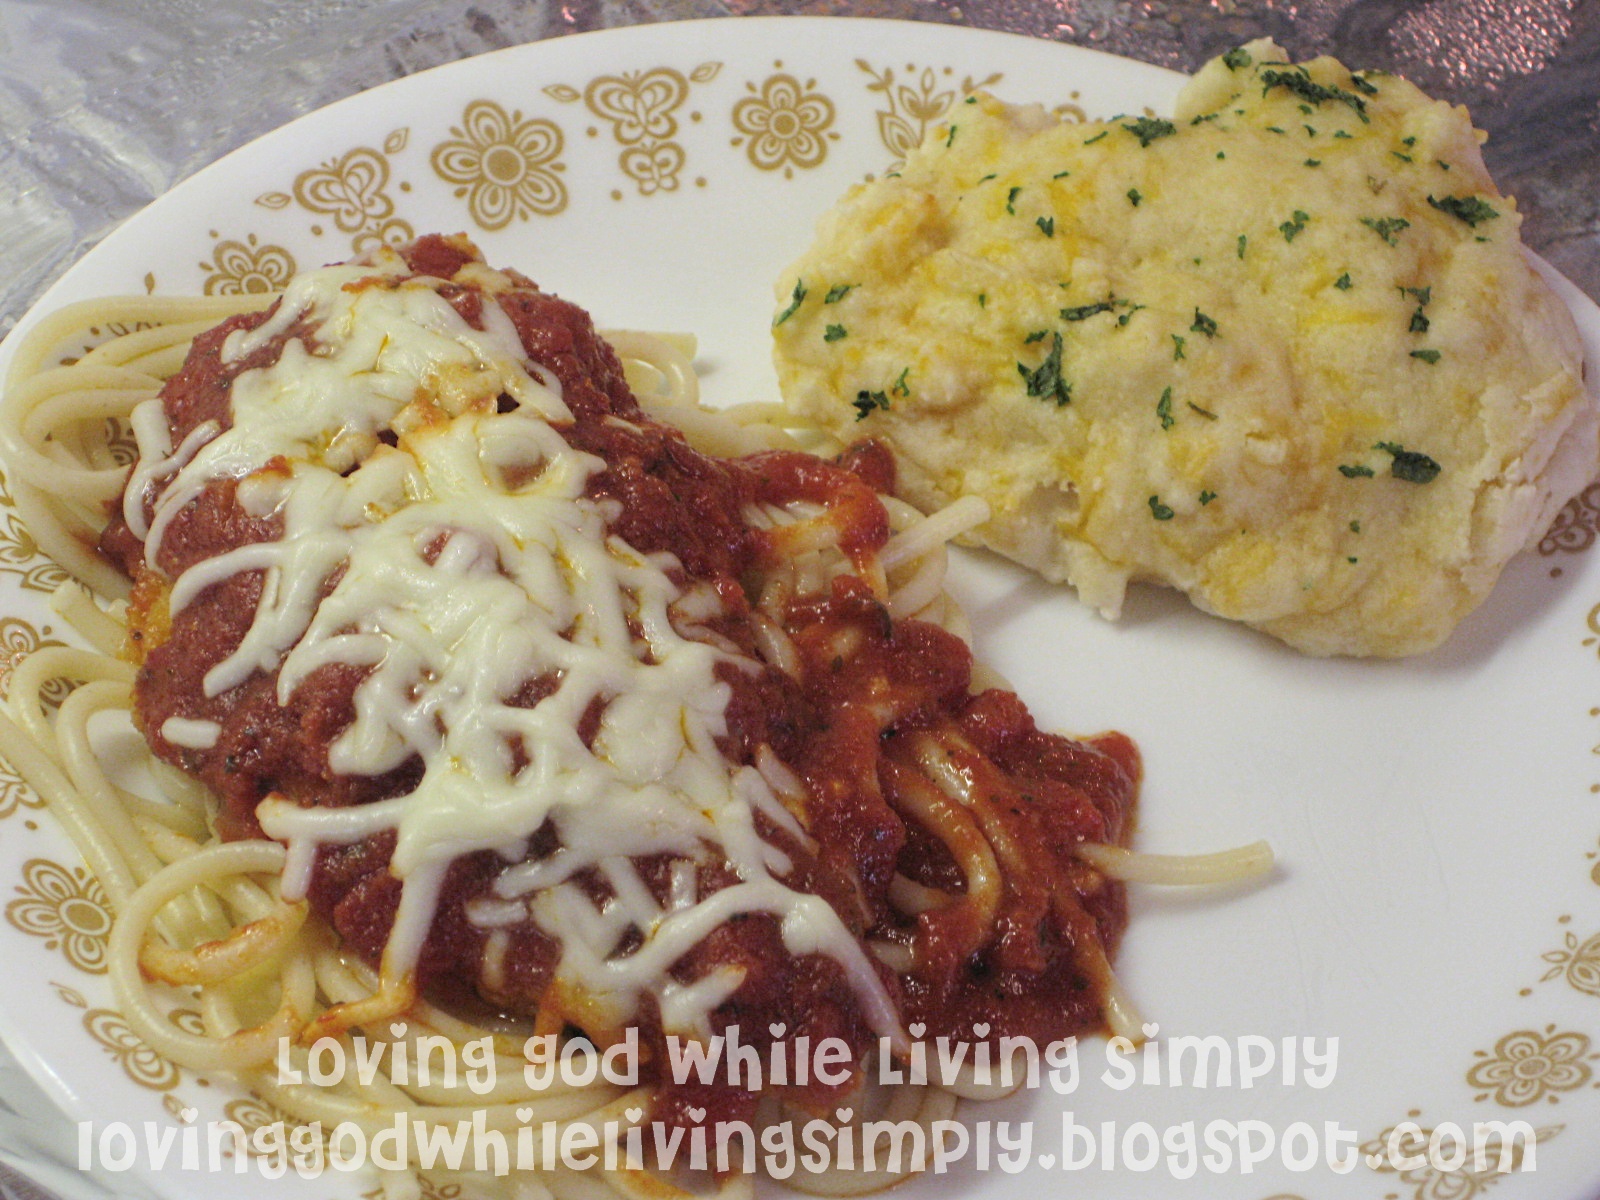
Chicken Parmesan

I've decided to start incorporating new recipes into our weekly menus.  We eat the same things pretty often, which works, but then you get tired of certain meals.  I like to make something new, plus, it would make supper less boring sometimes!  :)

Last week:  Chicken Parmesan


Before I get to the recipe, I've seen other bloggers post things about "keeping it real", by showing others the mistakes they have made on projects, etc.  Well, allow me to show you my latest mistake.  I have entitled it, "When Homemade Rolls Go Wrong..."

Notice I didn't add our blog address to this picture!!  ;)
Haha!!  I made a batch of homemade rolls last week, and they were really good, but the dough was super sticky.  I baked a few that night (they were delicious!) and then decided to freeze the rest.  I didn't know if that would work or not, but I love being able to take out just a few rolls for supper without having to cook the whole batch!  Well, I cooked some last night, and once they thawed out, they just became one giant mess.  Then, I asked my husband to pull the plastic wrap off of them, and that made them even worse!  Memo to me:  Add more flour next time!  ;)  They still tasted good, but it was too funny!

On to the point of this post...

I LOVE Chicken Parmesan.  I love chicken, and I love italian food.  What's not to love about this dish?  (I guess I should ask my hubby--he said it was good, but he isn't a CP fan.)

I will warn you, that sometimes I am "that person" who cooks without measuring things.  I followed a recipe for some guidance, but didn't follow it exactly.  My child(ren) will probably hate me one day for it when they're using my recipes and trying to figure out how much "a little bit" really means.  ;)

You will need:

  • Boneless Chicken Breasts
  • Salt and Pepper
  • Italian Seasoning
  • 1 Egg
  • Milk
  • Regular (or Italian) Bread Crumbs
  • Panko Bread Crumbs
  • Parmesan Cheese (I just used it out of a can)
  • Spaghetti/Marinara Sauce
  • Butter

I started with four skinless chicken breasts.  I tenderized and seasoned them with salt and pepper.


Next, I made a breading mixture that included regular bread crumbs, Panko Bread crumbs*, Parmesan Cheese, and some Italian Seasoning, which I probably wouldn't have done if I had Italian Breadcrumbs instead of regular.  I would suggest starting with around 1/2 cup of each of the bread crumbs, 1/4 cup of parmesan, with maybe a couple of teaspoons worth of seasoning.  You might want to just start there and use your own judgment!  Of course, it all varies depending on how much chicken you're preparing too.  ;)

*(If you don't know what Panko Bread crumbs are, then you should.  ;)  I started using them a couple of years ago on fried chicken mainly, and it makes it SO crispy and yummy!  Try it out next time.)  ;)


Before I started breading the chicken, I put a couple of tablespoons or so of butter in a pan and turned the burner to medium heat.  Of course, I had to watch it to make sure the butter didn't burn!  Next time I might try Olive Oil.

I dipped each piece of chicken in the breading mixture, then, I dipped each piece in a mixture of a beaten egg with a little milk.  (This is what I'm talking about--how do you know how much 'a little milk' actually is??  Probably 1/8-1/4 of a cup, don't worry, I don't think it really matters!)

Then, I dipped each piece into the breading and placed them in the pan.  I browned each side.


Next, I added some good ol' Ragu spaghetti sauce.  I believe it was the "Parmesan and Romano", but go with whatever your heart desires.  :)

Again, I didn't measure out the sauce, but I like a lot of sauce, so I poured it all over the chicken and in the pan until I was satisfied with the amount.


And now, a moment of complete honesty, at the risk of sounding like an idiot.  (It's good to remain humble.)  I have no clue how long I let it cook with the sauce covering it.  (This is what happens when I'm multitasking by cooking multiple things at one time, trying to avoid stepping on the tupperware M has scattered around the floor, and also occasionally having to chase her when she tries to make an escape from the kitchen.)  I tend to be on the more cautious side when cooking chicken, because I'm always paranoid about it not being completely done.  I would guess a time for you, but I don't want to give you the wrong number, so when it doubt, cut one of them open and look!  Next time I make it, I'll try to time it.  Until then, I'm afraid you'll have to once again use your own judgment.  ;)  Sorry!

After *ahem* a certain amount of time passed... I added some mozzarella cheese to each piece of chicken.  I covered the pan and let the cheese melt.  I don't have a lid for my pan, so I just put some foil paper (or aluminum foil.. my husband makes fun of me for saying foil paper..) over the top to trap in the heat.  ;)


Once I did my 'cut open the chicken test', I turned off the heat, and placed a piece of chicken on a bed of spaghetti noodles.  Yum.  This is where the extra sauce in the pan comes in handy, because I just scooped out extra to add to my noodles.  :)  Get your lycopene, people!  ;)


If you're wondering about that yummy biscuit, it's like the Red Lobster Cheddar Biscuits.  They are FABULOUS.  I have an actual written down recipe for that, but I think this post is long enough for now.  If you're interested, let me know and I'll post it.

Hope y'all enjoy, and are able to understand enough of these directions to be able to improvise when needed.  ;)  If you have any questions, I will do my best to answer them!  Have a fabulous week!

Check out the links tab to see where I party!  :)

Wednesday, August 17, 2011

Homemade (and Cheap!) Yogurt

My little boy, T, loves loves loves yogurt.  Not the kind that has all the sugar and flavorings, although he probably would love it if we gave it to him.  But, we just give him plain, tart, high-fat yogurt, and he LOVES it.  But, the problem is...it's expensive!  When you are trying to be on a grocery budget, like we are, $2.10-$3.00 for a carton of yogurt (and that's the "cheap" store brand) takes a large portion of your budget, especially how fast we got through it!  So, we decided to try to make our own yogurt.  Actually, my husband decided to.  I thought it would be too hard and the savings wouldn't be worth the effort.  Boy, was I wrong!  It saves a ton of money AND is incredibly easy!  There won't be any pictures on this...because they would be boring pictures since every picture would be a crockpot.

Quick breakdown of the savings:
One 32-oz carton of yogurt (cheap brand) is $2.10-$3.00 (and remember, the other brands will be even more expensive)
Four cartons of homemade yogurt = cost of one gallon of milk (depending on what kind of milk you get -- for us, the $3.15 gallon at this time)


There are a lot of blogs out there that say use "full-fat" milk only to make the yogurt, but we have even used skim and it works great. 

The first time you make this, you will need one cup of regular yogurt as a starter.  After you have already made some, you can always reserve a cup for making more.


Ingredients:
1 gallon milk (or 1/2 gallon)
1 cup yogurt, homemade or store-bought (or 1/2 cup)

Pour the milk in the crockpot.  Cover and cook on low for 2 1/2 - 3 hours.

Without opening the lid (there will be no reason to look inside -- it just looks like hot milk), turn off crockpot and leave sitting for 3 more hours.

Take off lid, mix in 1 cup of yogurt, put lid back on, cover/wrap in a towel (to be honest, not sure why, but we do it), and leave sitting for 8 hours.

Yogurt is ready!  I like mine with a little cinnamon and maple syrup.  Delish!

If you like the thicker yogurt, like greek yogurt, place a coffee filter or cheesecloth in a colander, put the yogurt in the colander, and until the whey (clear yellow liquid) drains out.

You can even freeze the yogurt if you made too much.  You can also add fruit to the yogurt to make flavored yogurt.

I think this yogurt tastes better than store-bought yogurt...and so little effort!  Enjoy! 

Sunday, July 31, 2011

Homemade Peanut Butter and Cookies!

My husband and I have been really pondering lately how to save money as well as eat more healthy, especially having one child already and another child on the way.  We've been really interested in learning how to make foods, even staples, from scratch.  Not only does it usually save money, but it also makes us feel better as parents knowing that the foods we make have no preservatives in them.  One thing we've learned to make recently is homemade peanut butter.  Now, peanuts can be expensive, but we were able to find them on sale for $1.00 a pound, and the normal price were we can get bulk isn't much more than that.  One pound of peanuts will make a normal jar of peanut butter.  So, $1.00 for a jar of peanut butter -- and preservative-free -- that's a deal in my book!  And making it is super easy.  Really.  Honestly.  Super easy!  

Buy a pound of shelled peanuts -- either roasted or not.  We've made the peanut butter both ways -- with roasted and unroasted peanuts, and in our opinion, roasted peanuts make MUCH better peanut butter, and you don't have to add any oil this way.  My husband had already roasted them when I came home one day, so I don't have any pictures of that.  Simply, lay the raw shelled peanuts in a single layer on a cookie sheet and bake 15-20 minutes at 350 degrees.  Stir once or twice during cooking.  You want them to be brown, but not burnt.  

I had my 16 month old helping me during the process of making the peanut butter.  As you can see, he desperately wanted to eat some of the peanuts, so I had to be quick to keep his hands out!  I used a pound of peanuts, but did it in two batches, so each picture is half of the batch (the final picture is the whole batch).  You can see in the picture the peanuts after being roasted.  Put half the peanuts in a mixer.  Keep your child's hand out of the mixer please!  With the lid on, start the mixer and let it go!
 

This is my son watching the peanuts in the mixer and signing "eat"!  He couldn't wait to try it out!


Before it all starts clumping up together, add whatever you want.  I added a little salt and honey, but you can also add some syrup or cinnamon if you want.  As you can tell from the picture, the peanut butter will start to clump up but keep it going!


My child thought this was all fascinating!


As it continues to mix, it will start to break down the clump of peanuts and make this lovely paste.  The more you mix, the creamier it will be.


The final product!  Filled the whole jar!  My son LOVED it!  Kept signing "eat" and "more" :)  Just remember to keep it in the fridge.  See how easy it was!  And peanuts was the only ingredient...other than your add-ins, of course.


Now, I want to share with you my favorite peanut butter cookie recipe.  I hate making cookies because they never come out right, unless they are from a mix.  The butter is so hard for me to cook with -- never can "soften" the butter just right.  But this recipe is incredibly easy and you can use your homemade peanut butter in it!  You only need four ingredients:  1/2 cup of peanut butter, 1/2 cup of sugar, 1 egg, and whatever add-ins you want (I used cranberries in this batch, but you can use raisins or chocolate chips, or nothing!).


Just combine and mix!


In preheated oven at 350 degrees, just drop the cookies on an ungreased cookie sheet and cook for about 11-14 minutes, depending on their size.  You can make about 12 small cookies or 9 larger cookies.  I made these cookies a little too big, but they were still wonderful!


I asked my husband what he thought about them, and he loved them.  He couldn't believe their wasn't any flour, butter, eggs, etc in these because they taste just like regular peanut butter cookies!

Hope you enjoy!

Wednesday, July 27, 2011

Garlic Bread

What is the best part about going to an Italian restaurant?  The bread, of course!  Well, if it's free.  ;)

When I cook spaghetti or lasagna, I like to make bread to go along with it.  Sometimes it's just a regular slice of bread that I butter, sprinkle with garlic powder, and pop into the toaster oven.  Sometimes it's a little more complicated, but then, I saw this awesome recipe.

Trust me, the picture doesn't do it justice.
It's called Garlic Parmesan Pull-Apart Bread and I found it on The Pastry Affair blog.  It looked delicious, so I decided to try it out.

I was a little hesitant to try it out, because it looked like it would be a very long process, but it really wasn't difficult at all.  Especially with a bread machine.  ;)

Once again, I will not post the recipe here, because it isn't mine to post.  Go check out her blog for the recipe.

I'll tell the slight modifications I made, though.  I don't have a bundt pan, so I had to use a small pan and made two stacked rows.  Instead of parmesan cheese in between the layers, I just added some cheddar cheese.  I also added cheddar to the top, along with a little parmesan.  This makes a TON of bread.  It's a little misleading to look at the picture above, because we ate off of it for a few days, and still didn't finish it.

If you already have supper plans for tonight, and they don't include this bread, then you should alter your plans.  You will have a happy tummy.  :)

Tuesday, July 19, 2011

Cinnamon Rolls

Don't you love to wake up on a Saturday morning and have a special breakfast?


You know, instead of grabbing your cereal, you go to the fridge, and take out a can of store brand cinnamon rolls.  You check the expiration date, peel off the paper, and it doesn't pop.  So then, you proceed to hit the can on the side of the counter until it pops open, scaring you half to death.

No?  This is just me?

In all seriousness, I used to love cinnamon rolls in a can, and I still like them occassionally.  However, I found a recipe for homemade cinnamon rolls on allrecipes.com a few years ago, and they are seriously the best cinnamon rolls I have ever tasted.  Granted, this isn't saying a lot, but I think you'll love them too!  :)

Soft, Moist and Gooey Cinnamon Rolls
Check out the above link for reviews on allrecipes.com.

Ingredients
  • Step One - Dough:

  • 1/2 (3.5 ounce) package instant vanilla pudding mix
  • 4 cups bread flour
  • 1 tablespoon white sugar
  • 1/2 teaspoon salt
  • 2 1/4 teaspoons bread machine yeast
  • 1 cup milk
  • 1 egg, beaten
  • 4 tablespoons melted butter
  • 4 tablespoons water

Step Two - Filling:

  • 1/2 cup butter, softened
  • 1 cup packed brown sugar
  • 2 teaspoons ground cinnamon
  • 1/4 cup chopped walnuts (optional)
  • 1/4 cup raisins (optional)

  • Step Three - Icing:

  • 1 teaspoon milk
  • 1 1/2 cups confectioners' sugar
  • 4 tablespoons butter, softened
  • 1 teaspoon vanilla extract

Directions

In a bread machine pan, place the milk, beaten egg, melted butter, water, vanilla pudding mix, bread flour, sugar, salt and yeast in the order recommended by the manufacturer. Select the Dough cycle.
When cycle is finished, remove the dough, and knead for 3 to 5 minutes. Roll out to a large rectangle.


Mix together the softened butter, brown sugar and cinnamon.  Don't do this ahead of time, and make sure that it isn't too soft.  Otherwise, when you spread it on the dough and roll it up, all of the filling will squeeze out.  I've learned this the hard way...twice.  ;) 


Spread over dough. Sprinkle with chopped walnuts and raisins, if desired. 


Starting with the widest end, roll the dough into a log. Pinch to seal seams. 


Cut into 1/2 inch to 1 inch slices, and place in a greased 9x13 inch pan. 


Place in a draft-free space, and allow to rise until doubled.


Preheat the oven to 350 degrees F (175 degrees C). Bake for 15 to 20 minutes. 


To make frosting, mix the milk, confectioners sugar, softened butter and vanilla in a small bowl. Spread over warm cinnamon rolls.  If you're like me, you might be concerned when you see how thick the icing is when you mix it together.  If you put it on the rolls right after they come out of the oven, it will melt the icing quite nicely!  :)


The pictures don't do them justice.  They're not as easy as opening a can, but super tasty!  :)

Check out the links to see where I party! :)


Friday, July 8, 2011

Pizza Night! :)

I think I've mentioned before that I love pizza more than the average person.  If it wouldn't make me gain weight and was healthier, I could eat it every day.  I really wish it was a vegetable.  Not that it had vegetables, but that the pizza itself, was considered a vegetable.  ;)

Alas, that's not the case.


Tonight, though, was pizza night.  :)  Since we were dating, my hubby and I have made homemade pizzas.  I've tried many different recipes from using a ready-made crust, to a canned crust, french bread, and making it from scratch.  They're all good, but I've desperately wanted the perfect pizza.


I can't honestly say that I've reached that goal, but the one I make now is pretty good, if I may say so myself.  ;)

I found the crust recipe on allrecipes.com, which is my 'go-to' website for recipes the majority of the time.

  • 1 package of active dry yeast (I believe this equals 2 1/4 teaspoons, but you want want to double check that!)
  • 1 teaspoon white sugar
  • 1 cup warm water (110 degrees F/45 degrees C)
  • 2 1/2 cups bread flour (It's a little better with bread flour, but regular flour tastes fine too.)
  • 2 tablespoons olive oil
  • 1 teaspoon salt
  1. Preheat oven to 450 degrees F (230 degrees C). In a medium bowl, dissolve yeast and sugar in warm water. Let stand until creamy, about 10 minutes.
  2. Stir in flour, salt and oil. Beat until smooth. Let rest for 5 minutes.
  3. Turn dough out onto a lightly floured surface and pat or roll into a round. Transfer crust to a lightly greased pizza pan or baker's peel dusted with cornmeal. Spread with desired toppings and bake in preheated oven for 15 to 20 minutes, or until golden brown. Let baked pizza cool for 5 minutes before serving.
What I love about this recipe is that it's super easy and fast.  You don't have to wait an hour for the dough to rise, but it still has a really good texture.  The only problem I have with it is that it's a little bland, but I sometimes spice it up a little bit.  :)

This time, I added a little Italian Seasoning right to the crust mixture. 

Instead of using a rolling pin, I just pat it into a circle on the pan.  (Who wants another dirty dish to clean?)  ;) Then, I made a mixture of melted butter, garlic powder, and italian seasoning to brush over the entire crust before putting on the toppings.  (You might want to bake it a little bit before adding toppings if you prefer a 
crispier crust.)
  

Sauce:
I have found that a good and cheap brand of pizza sauce is good ol' Ragu Homemade Style.  It's not really spicy, but I think it tastes pretty good, and it only costs a little over a dollar.  :)  I also like the Boboli sauce as well, but that has a stronger taste than I prefer sometimes.  

Cheese:
I used a "Pizza Blend" for the cheese this time, but a lot of times I just use mozzarella with a little bit of cheddar, or whatever we have in the fridge, to give it a little extra flavor.  


M had some pizza as well, but of course, preferred ours over her own, although it was pretty much the same thing!  Stinker.  ;)
To make it prettier, and give it a little extra "oomph" (?) I sprinkled a little bit more of Italian Seasoning and Parmesan around the edge of the crust.


It turned out pretty tasty.  Again, I'm still not completely satisfied with it, so if I come across something better, I'll let y'all know.  But, for now at least, this is the best (easiest) recipe I've found. 


Anybody else have some good pizza tips??  If you do, then please share!  :)


Check the links tab to see where I party! :)


Tuesday, June 28, 2011

Easy Homemade Granola Bars

I love trying to make snacks and meals from scratch.  Not all the time of course, but I kinda enjoy the challenge, and it makes you feel good (when it's successful, at least..).  ;)

I used to love the Quaker Oatmeal Chewy Granola Bars.  I thought they were SO good.  Well, no longer, my friends.  This recipe at The Suburban Jungle is definitely tastier (and cheaper!).


Out of respect for her blog, I'm not posting the recipe here.  I don't think it's very fair to copy everything to my own blog when I could just send the traffic her way, considering she made the recipe.  ;)

So, go ahead and check out the recipe... I'll wait here.

I'll tell you what I do differently.

  • I double the base recipe, just because I want to make more at one time.  
  • Then, I add about a cup of chocolate chips.  I've tried Dark Chocolate Chips, because I figured it was a little healthier...they have antioxidants!!  ;)  
  • I haven't tried any of the other optional items, but when I haven't had any rice krispies, I've just used all oats, which isn't bad, but not as good.  
  • I've also substituted Rice Krispies with whatever cereal I have on hand, such as Honey Bunches of Oats or Chex.  Those were both yummy.  
So, the recipe seems to be pretty flexible.

Plus, you don't have to bake it!  How awesome is that??  Love this recipe!!


Sometimes I cut them up into pieces, individually wrap them with saran wrap, and place them in a ziploc bag. That way, you can just grab one on the go.  Unfortunately, this hasn't happened lately.  (I should probably mention that I did it that way before I had a little one to keep up with!)  We usually end up just eating them out of the pan, which is delicious, although a little dangerous because of how accessible it is.  ;)

Hope y'all enjoy!

I party here!

Tuesday, June 14, 2011

Have Your Cake... and Vegetables too!

I don't know about you, but when I think of brownies, vegetables are about the furthest thing from my mind.

Until now.  ;)

This is our first year to have a vegetable garden.  It's not a beautiful garden by any means due to our lack of gardening tools, but that's okay.  :)

Look at these beauties.

When we picked these, I immediately knew what I wanted to make.

Zucchini Brownies.
I apologize for my pictures.  I love my camera, but the kitchen has terrible lighting!!
If you've never had Zucchini Bread, then you're first reaction is probably something along the lines of 'yuck'.  I understand, I'm not even a huge vegetable fan.  Yes, I eat them, because they're good for me.  But, if I have the option of a salad or a slice of pizza, I'm going for the pizza without hesitation.  For now, at least.  ;)

I found this recipe a year or two ago, probably when looking for a Zucchini Bread recipe.  I had no idea if it would be good or not, but I decided to give it a shot.

I'm glad I did.

These are DELICIOUS.

It isn't what you would expect at all.  You can't even tell there is Zucchini in there!  It's just crazy!  Talk about a good way to get your kids (or yourself) to eat their veggies!  (Granted, they will be getting sugar as well, so you have to weigh your options here, I suppose)  ;)

Let's make some!  :)  Here is the original recipe from allrecipes.com, in case you want to go check out more reviews.

Ingredients:

  • 1/2 cup vegetable oil
  • 1 1/2 cups white sugar
  • 2 teaspoons vanilla extract
  • 2 cups all-purpose flour
  • 1/2 cup unsweetened cocoa powder
  • 1 1/2 teaspoons baking soda
  • 1 teaspoon salt
  • 2 cups shredded zucchini
  • 1/2 cup chopped walnuts (optional)

Frosting:
There is a frosting recipe included on the link above, but I prefer the Hershey's "Perfectly Chocolate" Chocolate Frosting.


1/2 cup (1 stick) butter or margarine
2/3 cup HERSHEY'S Cocoa
3 cups powdered sugar
1/3 cup milk
1 teaspoon vanilla extract

Melt butter. Stir in cocoa. Alternately add powdered sugar and milk, beating to spreading consistency.
Add small amount additional milk, if needed. Stir in vanilla. About 2 cups frosting.


Now, on to the brownies..
Preheat your oven to 350 degrees.  Grease a 9x13 inch baking pan.
In a large bowl, mix together the oil, sugar and 2 teaspoons vanilla until well blended. 


Combine the flour, 1/2 cup cocoa, baking soda and salt.


Stir into the sugar mixture.


Not very appetizing is it?  I didn't even want to show you this picture, because, well, yuck.  The first time I made these, I was very confused at this point, because the only liquid I had added to the mixture was the oil 
and a little vanilla.  How in the WORLD would this make brownies???


Enter zucchini.


I peeled (using a vegetable peeler) the zucchini and chopped it into large chunks before throwing it in the food processor.  Then, I just pureed it until they were little, tiny pieces.  :)


Fold in the zucchini and walnuts (I didn't use the walnuts and they were still awesome).  I'm going to be honest here... this last time, I was a little lazy, and did not fold in the zucchini.  I was tired and wanted to hurry, so I just blended it quickly with a mixer.  I knew this could cause problems, but again, I was lazy.  So, my brownies were more like a cake this time around, but it was still SO good! 


Spread evenly into the prepared pan.   


Bake 25-30 minutes, until brownies spring back when touched.  (I also insert a toothpick to check if they're done, but I'm always a little paranoid about my brownies being done, although this recipe doesn't even have any eggs.)

Sorry, I didn't think to take any pictures as I made the icing.  It's super easy, though.  :)

And, 'wa-lah'.


I tried to take a picture of just a bite, to show you that you can't even really see the zucchini pieces, but it didn't turn out very clear.  Here it is anyway, just to give you an idea.


Isn't that amazing??  The zucchini adds SO much liquid--I never would have guessed that.  You will definitely be able to fool your kids with this one.  Just don't tell them it's in there.  ;)

(That makes me think of the Chef Boyardee Commerical, love it!) 

Enjoy!!  :)

Check out the links tab to see where I party! :)